06. Let's create circular particles!
Overview
In this chapter, you will create various effects using rings. You have specified the sprite as the drawing method, but this time you will specify the ring. The ring draws cylindrical particles. By changing the parameters, you can create not only circular but also various effects.
Ring
In addition, by changing the area (UV) used for the loaded image, try changing the image to improve the appearance.
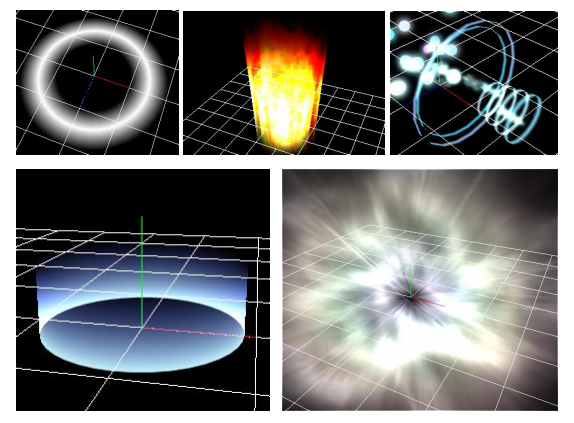
Effect No.1 created in this chapter
Effect No.2 created in this chapter
Effect No.3 created in this chapter
We made it possible to download the effect created in advance from the link below.
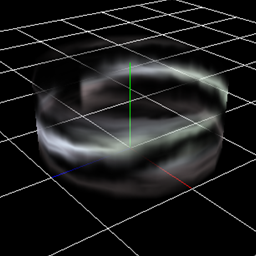
A basic ring
The first effect you create is a ring whose shape changes with time.
Please open effect1.efkefc.
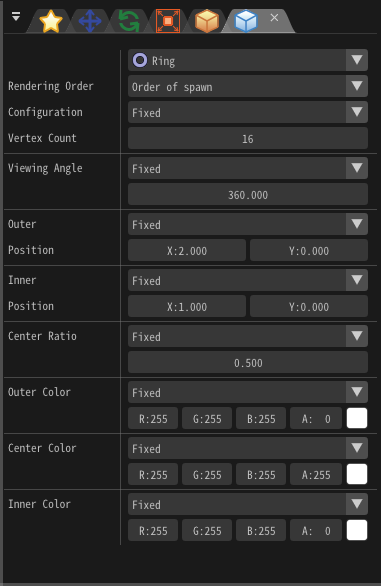
You specify the ring for particle drawing method. You change the sprite in the "Render Settings" window to Ring.
Ring
After changing, when you play an effect, you can see that the rings are displayed.
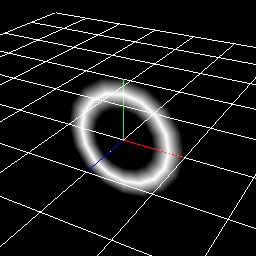
Ring
You can change the shape of this ring by changing the parameters.
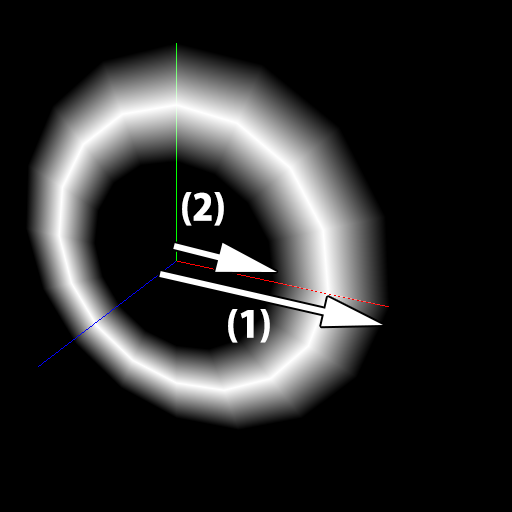
The shape of the ring is specified by the outer ring (1) and the inner ring (2) of the "Render Settings" window. Here, you specify the direction (x) to the outside of the circle and the length (y) in the axial direction.
The xyz direction of the preview screen differs from the xy direction you specify.
Inner,Outer
These values can also be changed by easing.
Change the values of the outer and inner rings as follows.
This indicates that only the Outer-Position moves from (1, 2) to (3, 0) while fixing the Inner-Position position at (1, 0).
| Window | Value type | Value |
|---|---|---|
| Basic Settings | Time to live | 60 |
| Rotation | Angle | x=0, y=0, z=-45 |
| Render Settings | Outer | Easing |
| Render Settings | Outer-Start(Mean) | x=1, y=2 |
| Render Settings | Outer-End(Mean) | x=3, y=0 |
You can see that the shape of the ring is changing. The ring is compatible with circular effect.

Inner ring, Outer ring
A triangle
The second effect you create is a triangle.
Please open effect2.efkefc.
You can express various shapes by changing the number of vertices composed 0f the ring. In the initial setting, the number of vertices is large, so the particles look like circles. Reducing the number of vertices allows you to express shapes such as triangles, rectangles, and hexagons.
In this chapter, You try to create a triangle. Change the number of vertices to 3 from the "Render Settings" window. You can see that changing the value will result in a triangle.
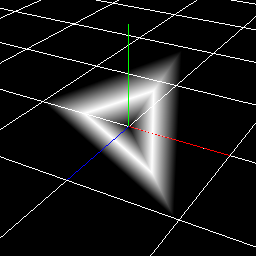
A triangle
UV Scroll
The third effect you create is a ring with an image.
Please open effect3.efkefc.
You can also specify an image to the ring. By specifying the image, expression of the shock wave and the aura which blows up etc. becomes easier.
Let's specify the image immediately. Select "Scroll.png" from the "Basic Render Settings" window.
You can see that the color of the ring has changed from single color to image.
Image
However, this is not appetizing. If you change the image according to the passage of time, it looks better. In Effekseer, you can change the area (UV) of the image used for particles.
Let the area of the image used for the particles move over time.
Change UV from "Basic Render Settings" window.
Change UV Standard to Scroll.
Then, nothing is shown.
This is because you have not set the area of the image to use.
Enter the image size (256, 256) in the size. Next, enter (0, 5) as the moving speed.
You can see that the image is moving.

UV Scroll
Finally, I made it possible to download the effect created in this chapter.
Summery
In this chapter, you created an effect using a ring. In the next chapter, you will create complicated effects using parent-child relationships.